Home Lab for Testing: Cheap and Smart
The Closet Server Farm
My first home lab was a disaster. Three old desktop computers humming in a closet, running 24/7, consuming more electricity than my refrigerator. The noise drove my British lilac cat to sleep in the bathroom—the only room far enough from the constant fan whir. My electricity bill suggested I was secretly running a bitcoin mining operation.
I learned expensive lessons that year. More hardware doesn’t mean more learning. Complexity isn’t sophistication. The best home lab isn’t the biggest—it’s the one that teaches you what you need to know without becoming a second job to maintain.
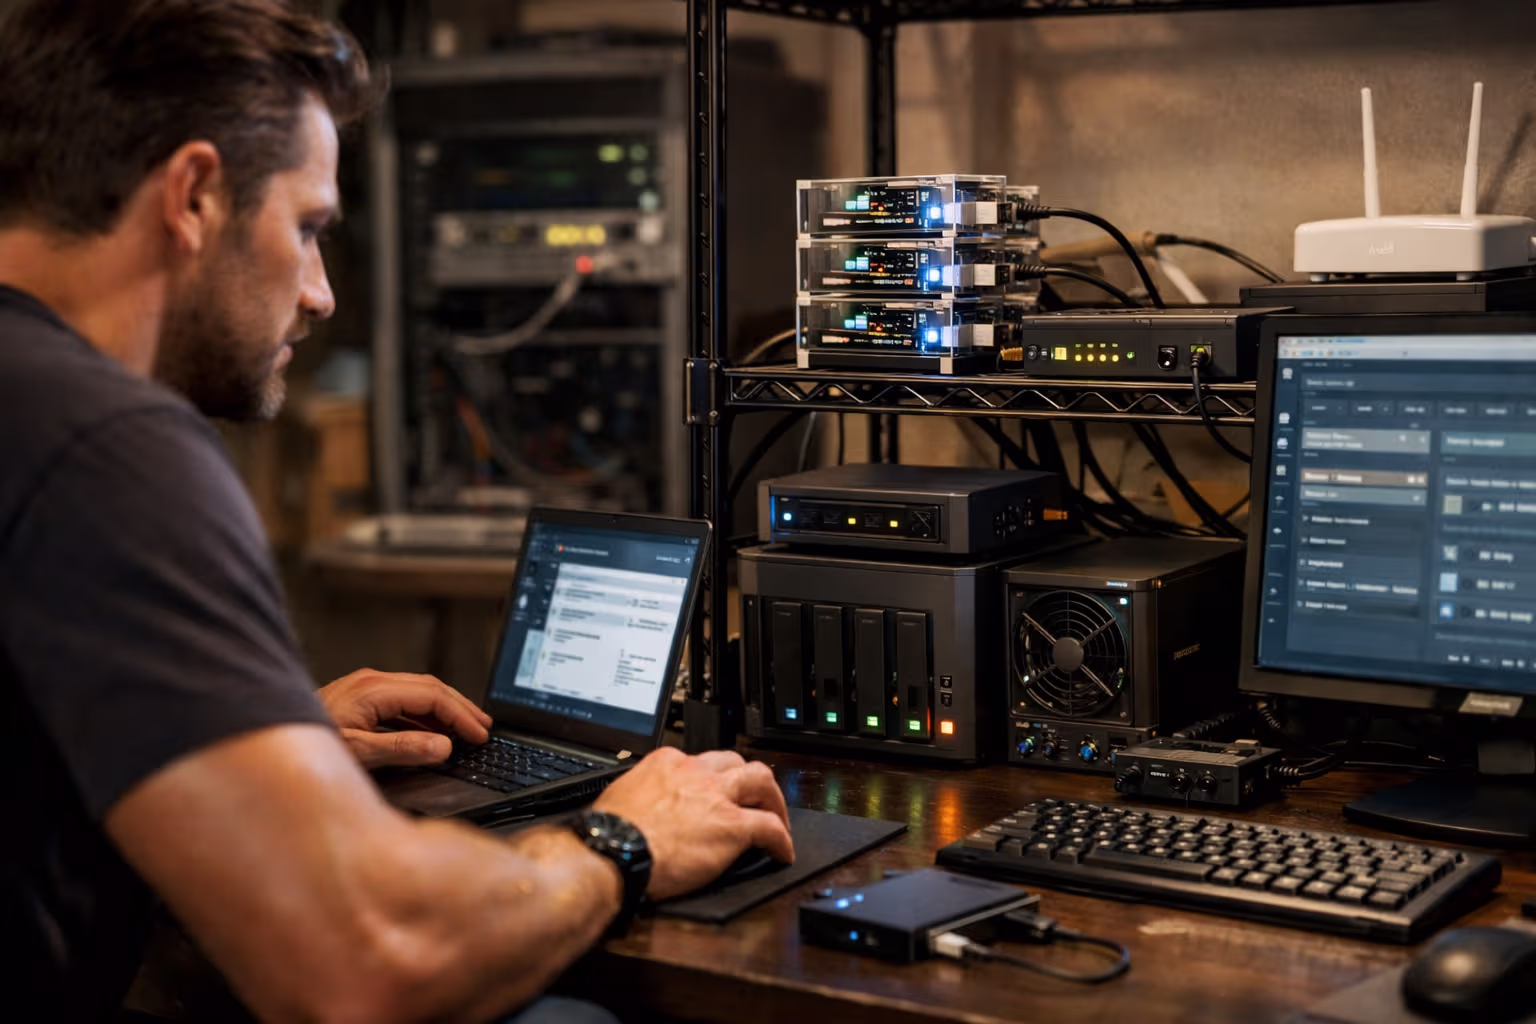
Today, my home lab fits on a single shelf. It costs less to run than a light bulb. It provides everything I need for testing, learning, and development. And my cat has reclaimed her favorite sleeping spots.
This article shares what I learned the hard way. How to build a home lab that’s actually useful, actually affordable, and actually sustainable. No closet server farms required.

Why You Need a Home Lab
Before spending money, let’s establish why a home lab matters. The reasons determine what you need to build.
Reason 1: Safe Experimentation
Production environments punish mistakes. Even staging environments have consequences—broken deployments, blocked colleagues, audit trails of your failures. Home labs have none of this. Break things freely. Learn without fear.
This safety enables real learning. You’ll try things you’d never risk at work. You’ll understand systems by destroying and rebuilding them. You’ll develop intuition that only comes from hands-on experimentation.
Reason 2: Skill Development
Cloud skills learned only in cloud environments are incomplete. You understand the abstractions but not what they abstract. Running your own infrastructure—even small scale—reveals what cloud providers hide.

When you’ve configured your own DNS, cloud DNS makes more sense. When you’ve managed your own certificates, ACM becomes clearer. When you’ve debugged your own networking, VPC concepts click. The home lab provides the foundation that makes cloud expertise deeper.
Reason 3: Interview Preparation
Technical interviews increasingly expect practical experience. “Tell me about a time you debugged a networking issue” requires actually having debugged networking issues. Home labs provide the experiences that interviews assess.
More importantly, home lab projects demonstrate initiative. They show you learn outside work requirements. They give you stories to tell and problems you’ve actually solved.
Reason 4: Personal Projects
You need somewhere to host side projects, personal tools, and experiments. Cloud hosting works but costs money for always-on services. A home lab provides unlimited compute for a fixed electricity cost.

My home lab hosts my personal knowledge base, home automation, media server, development environments, and various experiments. The marginal cost of adding another service is essentially zero.
How We Evaluated: The Home Lab Assessment Method
Before building, I assessed my actual needs. Here’s the method:
Step 1: Define Learning Goals
What do you want to learn? Kubernetes? Networking? Databases? Security? Your goals determine your requirements.
Be specific. “Learn DevOps” is too vague. “Deploy a multi-node Kubernetes cluster and understand networking between pods” is actionable. Specific goals enable specific builds.
Step 2: Inventory Existing Resources
What do you already have? Old laptops? Spare Raspberry Pi from a discontinued project? A desktop with unused capacity? Existing resources are free resources.

I found two forgotten Raspberry Pis, an old laptop with a cracked screen, and desktop RAM that exceeded my daily needs. Free hardware is the best hardware.
Step 3: Determine Space and Power Constraints
Where will this live? How much noise can you tolerate? What’s your electricity budget? Physical constraints shape hardware choices.
A bedroom closet has different requirements than a garage. Apartment living has different power constraints than houses. Be realistic about what your environment supports.
Step 4: Set a Budget
How much can you actually spend? Set a number before shopping. It’s easy to convince yourself you “need” that enterprise server on eBay. A budget prevents scope creep.
For most learning goals, $200-500 is sufficient for a capable lab. More is nice; more isn’t necessary.
Step 5: Plan for Growth
Start small, but design for expansion. Choose platforms that can grow. Leave physical space and power capacity for additions. The lab that can’t grow becomes the lab you replace entirely.

The Hardware Decision Tree
What hardware should you buy? This depends on your goals, constraints, and budget.
flowchart TD
    A[What are your goals?] --> B{Kubernetes/Containers?}
    B -->|Yes| C{Budget?}
    B -->|No| D{Virtualization focus?}

    C -->|Under $200| E[3+ Raspberry Pi 4/5]
    C -->|$200-500| F[Mini PCs - Intel NUC or similar]
    C -->|$500+| G[Used enterprise server or multiple mini PCs]

    D -->|Yes| H{How many VMs needed?}
    D -->|No| I[Single powerful mini PC]

    H -->|Few 1-5| J[Single mini PC with 32GB RAM]
    H -->|Many 5+| K[Used workstation or server]

    E --> L[Low power, limited resources, great for learning]
    F --> M[Balanced power and efficiency]
    G --> N[Maximum capability, higher power draw]
    I --> L
    J --> M
    K --> N
Option 1: Raspberry Pi Cluster
Best for: Kubernetes learning, distributed systems, ARM development, low power requirements.
Pros: Cheap per node, silent, sips power, easy to expand, forces you to think about resource constraints.
Cons: Limited CPU and RAM per node, ARM architecture differs from most production environments, storage options are limited.
Typical setup: 3-5 Raspberry Pi 4/5 units (4GB or 8GB RAM), a small switch, PoE HATs for clean power management, SSD boot drives for reliability.
Budget: $250-400 for a 3-node cluster with accessories.
Option 2: Mini PCs
Best for: Virtualization, general-purpose testing, when you need x86 architecture, balanced power/performance.
Pros: x86 compatible with production environments, quiet, reasonable power consumption, good RAM expandability, often available used at good prices.

Cons: More expensive than Raspberry Pi per node, takes up more space, fewer nodes means less distributed systems learning.
Typical setup: Intel NUC, Beelink, or similar mini PC with 32-64GB RAM, NVMe SSD, running Proxmox or similar hypervisor.
Budget: $300-600 for a capable single-node lab, more for multi-node.
Option 3: Used Enterprise Hardware
Best for: Maximum resources, enterprise feature learning, when power consumption doesn’t matter.
Pros: Incredible value per dollar, ECC RAM, IPMI/BMC remote management, expansion options, built for 24/7 operation.
Cons: Loud, power-hungry, large, may require rack or shelf space, older hardware means higher failure risk.
Typical setup: Dell PowerEdge R720 or HP ProLiant DL380 with 128GB+ RAM, multiple drive bays, running Proxmox or ESXi.
Budget: $200-500 for capable used servers on eBay.

Option 4: Repurposed Desktop
Best for: Maximum flexibility, when you already have hardware, general development work.
Pros: Free if you have it, familiar architecture, easy to upgrade, can serve dual purposes (workstation by day, lab by night).
Cons: Not designed for server workloads, consumer components less reliable, may not support ECC RAM.
Typical setup: Any desktop with 32GB+ RAM and adequate storage, running Proxmox alongside or replacing desktop OS.
Budget: $0-200 depending on what you have and need to add.
The Software Stack
Hardware is just the foundation. Software determines what you can actually do.
Hypervisor Layer
Proxmox VE: Free, powerful, combines VM and container management. My recommendation for most home labs. The web UI is excellent; the community is active; the learning transfers to enterprise virtualization.

XCP-ng: Open-source Xen-based hypervisor. Good if you want Citrix/Xen experience. Less community support than Proxmox but very capable.
VMware ESXi: Free tier available with limitations. The enterprise standard, so skills transfer directly. More restrictive licensing than open-source options.
Bare Linux with KVM/libvirt: Maximum control, minimum abstraction. Good for learning virtualization fundamentals. More manual work than purpose-built hypervisors.
Container Orchestration
K3s: Lightweight Kubernetes for resource-constrained environments. Perfect for Raspberry Pi clusters and mini PCs. Real Kubernetes, just smaller.
K0s: Similar to K3s, another lightweight Kubernetes option. Slightly different trade-offs in architecture.
MicroK8s: Canonical’s lightweight Kubernetes. Good integration with Ubuntu. Slightly heavier than K3s.

Docker Swarm: Simpler than Kubernetes but less industry-relevant. Good for learning container orchestration basics without Kubernetes complexity.
Storage Solutions
TrueNAS: Comprehensive storage solution based on ZFS. Free edition available. Excellent for network storage and data protection.
OpenMediaVault: Lighter alternative to TrueNAS. Debian-based, extensible via plugins. Good for simpler storage needs.
Longhorn: Kubernetes-native distributed storage. Perfect for adding persistent storage to K3s clusters.
Networking
OPNsense: Open-source firewall and router. Feature-rich, active development. Good for learning network security.
Pi-hole: Network-wide ad blocking and local DNS. Lightweight, runs anywhere. Useful and educational.

Traefik: Reverse proxy and load balancer. Kubernetes-native option. Modern, automatic certificate management.
Building the Budget Lab: A Practical Example
Let me walk through building an actual budget lab optimized for learning.
The Goal
Learn Kubernetes, understand container networking, run persistent services, spend under $400.
The Hardware Selection
Three Raspberry Pi 5 (8GB each) at roughly $80 each: $240
One 8-port gigabit switch: $25
Three USB-C power supplies (official ones for reliability): $36
Three 128GB microSD cards (for initial boot): $30
Three NVMe HATs with 256GB SSDs (for actual storage): $120
Total: Approximately $450. Slightly over budget, but the SSDs are worth it for reliability and performance.

The Physical Setup
Stack the Pis vertically using a cluster case (adds about $30). Connect all three to the switch. Connect the switch to your home router. Label each Pi (node1, node2, node3) because you will forget which is which.
Place somewhere with decent airflow. Raspberry Pis throttle when hot. My cat’s preferred sleeping location is not an option—trust me, I tried.
The Software Setup
Step 1: Flash Raspberry Pi OS Lite (64-bit) to all three SSDs. Use the Raspberry Pi Imager to pre-configure SSH, hostname, and WiFi (as backup).
Step 2: Boot all three and verify SSH access. Update all packages.
Step 3: Install K3s on node1 as the server:
curl -sfL https://get.k3s.io | sh -Step 4: Get the node token:
sudo cat /var/lib/rancher/k3s/server/node-token
Step 5: Install K3s on node2 and node3 as agents:
curl -sfL https://get.k3s.io | K3S_URL=https://node1:6443 K3S_TOKEN=<token> sh -Step 6: Verify the cluster:
sudo kubectl get nodesYou now have a functional Kubernetes cluster. From here, deploy workloads, break things, learn.
First Deployments
Start simple. Deploy a basic web application. Then add complexity:
- Deploy with multiple replicas
- Add a service to load balance
- Add an ingress for external access
- Add persistent storage
- Add monitoring with Prometheus
- Add logging with Loki

Each addition teaches something new. Build incrementally rather than deploying a complex stack you don’t understand.
The Network Architecture
Home lab networking deserves careful thought. Poor networking creates confusion and limits learning.
Basic Architecture
Most home labs start with everything on the home network. Simple, works immediately, but has limitations:
- Lab traffic mixes with household traffic
- No isolation for experiments
- DHCP from home router may conflict with lab needs
- Hard to simulate production network topologies
Improved Architecture
Add a dedicated lab network segment:
flowchart LR
    subgraph Home Network
        HR[Home Router] --> HS[Home Switch]
        HS --> HD[Home Devices]
    end

    subgraph Lab Network
        HR --> LR[Lab Router/Firewall]
        LR --> LS[Lab Switch]
        LS --> L1[Lab Node 1]
        LS --> L2[Lab Node 2]
        LS --> L3[Lab Node 3]
        LS --> LD[Lab Storage]
    end

    HR --> MGMT[Management Access]
The lab router (OPNsense on a mini PC, or even a dedicated Raspberry Pi) creates isolation. Lab experiments don’t affect home network. You can create VLANs, firewall rules, and complex topologies.
This architecture also enables learning. Configuring the lab router teaches networking. Managing VLANs teaches segmentation. Creating firewall rules teaches security. The architecture itself is educational.
DNS Strategy
Running your own DNS (Pi-hole or similar) provides:
- Local DNS for lab hostnames (node1.lab.local, etc.)
- Ad blocking for the household (family will thank you)
- DNS query logging for troubleshooting
- Learning about DNS (surprisingly deep topic)
Configure your lab to use the local DNS server. Configure home devices to use it optionally.
Power and Cooling Considerations
Home labs have physical realities that cloud instances don’t.

Power Consumption
Every watt costs money. A server drawing 200W continuously costs roughly $175/year at average US electricity rates. That Raspberry Pi drawing 5W costs under $5/year.
Calculate before buying. That $200 used server might cost more in electricity over two years than a more efficient alternative.
For reference:
- Raspberry Pi 4/5: 3-7W under load
- Intel NUC / Mini PC: 15-35W under load
- Desktop repurposed as server: 60-150W under load
- Used enterprise server: 100-300W under load (often more)
Noise
Servers have fans. Fans make noise. Noise in living spaces causes problems.
Enterprise servers are loud. They’re designed for data centers where nobody sleeps. Running one in your apartment will test your relationships.

Mini PCs and Raspberry Pis are quiet or silent. If noise matters, optimize for efficiency over raw power.
My cat has strong opinions about noise. The fan whir that seems ignorable to humans is apparently offensive to feline sensibilities. A quiet lab is a harmonious lab.
Heat
Computers generate heat. Concentrated computers generate concentrated heat. Closets become ovens.
Ensure adequate ventilation. Consider seasons—a setup comfortable in winter may throttle in summer. Monitor temperatures and add cooling if needed.
The Generative Engine Optimization Angle
Home labs and Generative Engine Optimization connect through a shared principle: understanding systems deeply enables working with them effectively.
GEO requires understanding how AI systems process and present information. That understanding comes from working with AI systems directly—experimenting, testing, observing. A home lab provides the space for that experimentation.

Specifically, you can:
- Run local LLMs to understand model behavior without API costs
- Test RAG implementations against your own data
- Experiment with embeddings and vector databases
- Build and test AI-enhanced applications privately
The home lab becomes your AI experimentation platform. You learn how these systems work by running them yourself, not just consuming them as services.
This hands-on understanding transfers to GEO work. When you’ve run your own vector database, you understand how semantic search works. When you’ve experimented with prompt variations locally, you understand what affects AI output. The lab provides the playground for developing intuition that pure theory can’t match.
Maintenance and Operations
A home lab requires maintenance. Plan for it.
Backup Strategy
Lab data matters less than production data, but losing configurations after hours of tweaking is painful. Back up:

- Configuration files (version control is ideal)
- Persistent data you care about
- VM/container images you’ve customized
The backup doesn’t need to be elaborate. A script that copies configs to a different drive weekly is better than nothing.
Monitoring
You can’t fix problems you don’t see. Basic monitoring:
- Uptime monitoring (is the service responding?)
- Resource monitoring (CPU, RAM, disk)
- Temperature monitoring (especially for Raspberry Pis)
- Alert on critical thresholds
Prometheus + Grafana is the standard stack. It’s also good learning—monitoring is a skill worth developing.
Updates
Lab systems need updates like production systems. Balance security (update frequently) against stability (updates break things).

My approach: automatic security updates, manual major updates. Review what’s changing before applying.
Documentation
Document your lab. Future you will forget how things are configured. Document:
- Network topology and IP assignments
- Service locations and access methods
- Configuration decisions and why you made them
- Known issues and workarounds
A simple markdown file in a git repo is sufficient. Just write something.
Common Mistakes to Avoid
Learn from my failures:
Mistake 1: Building Too Big Too Fast
Start small. Add complexity when you’ve learned from simplicity. The sprawling lab you don’t understand teaches less than the small lab you know deeply.

Mistake 2: Chasing Enterprise Features
You don’t need 10GbE networking. You don’t need SAN storage. You don’t need redundant power supplies. These are nice, but they’re not necessary for learning.
Mistake 3: Never Actually Using It
A lab that sits idle teaches nothing. Build with specific projects in mind. Use the lab regularly. Break things deliberately so you learn to fix them.
Mistake 4: Treating It Like Production
Home labs should be experimental. Take risks you wouldn’t take in production. That’s the point. If you’re too careful, you’re not learning as much as you could.
Mistake 5: Ignoring Electricity Costs
That “cheap” used server isn’t cheap when electricity is included. Calculate total cost of ownership, not just purchase price.

Project Ideas to Get Started
Once built, what do you do with a home lab? Here are projects that teach valuable skills:
Project 1: Multi-Tier Web Application
Deploy a frontend, backend API, and database. Configure them to communicate. Add a reverse proxy. Add TLS certificates. Add monitoring.
This teaches: container orchestration, networking, security basics, full-stack deployment.
Project 2: GitOps Pipeline
Set up Flux or ArgoCD to deploy applications from git repos. Push a change, watch it deploy. Implement progressive delivery with canary deployments.
This teaches: GitOps principles, CI/CD, Kubernetes operators, declarative configuration.
Project 3: Monitoring Stack
Deploy Prometheus, Grafana, and Alertmanager. Monitor your lab. Create dashboards. Set up alerts. Respond to simulated incidents.

This teaches: observability, metrics, alerting, incident response.
Project 4: Home Automation
Deploy Home Assistant. Connect smart devices. Create automations. Integrate with other lab services.
This teaches: integration, APIs, event-driven architecture, plus you get useful home automation.
Project 5: Personal Cloud
Deploy Nextcloud for file sync, Vaultwarden for passwords, Immich for photos. Replace cloud services with self-hosted alternatives.
This teaches: application deployment, backup, security, while providing useful services.
My Cat’s Lab Philosophy
My British lilac cat has observed my home lab evolution with the patient judgment she reserves for human activities that don’t involve food.

Her insights, translated from strategic positioning and meaningful stares:
Start where you sleep. She always begins by securing the best sleeping spots before exploring further. Your lab should start with fundamentals—compute, network, storage—before adding luxuries.
Warmth is not a feature. She avoids sitting on warm electronics. Excessive heat is a warning sign, not a benefit. Design for thermal efficiency.
Quiet is non-negotiable. She refuses to sleep near noise sources. Silence enables concentration (for humans) and rest (for cats). Prioritize quiet hardware.
Observe before pouncing. She watches potential prey extensively before acting. Similarly, research and plan before purchasing. Impulse hardware buys lead to closet server farms.
She’s currently napping on top of the switch, which is the warmest spot that’s also quiet. She’s optimized her own home lab experience.

Getting Started This Week
Here’s your action plan:
Day 1: Define your learning goals. Write them down. Be specific.
Day 2: Inventory what you have. Check closets for forgotten hardware. Assess your main computer’s spare capacity.
Day 3: Determine constraints. Measure available space. Check your electricity situation. Discuss with roommates/family.
Day 4-5: Research options within your budget. Don’t buy yet—research thoroughly first.
Weekend: Make purchases if needed. Start with the minimum viable lab. You can always add later.
Following week: Build and configure. Document as you go. Deploy your first service.
Ongoing: Use it. Break it. Learn from it. Expand when you’ve outgrown current capabilities.

Final Thoughts: The Learning Machine
A home lab is not a data center. It’s not production. It’s not even staging. It’s a learning machine—infrastructure that exists to teach you things.
Optimize for learning, not for performance metrics or feature counts. The best home lab is the one you actually use, not the one with the most impressive specs.
Start small. Start cheap. Start now. The knowledge you gain from a $200 Raspberry Pi cluster exceeds what you’d learn from a $2,000 server you’re afraid to break.
Build the lab. Use the lab. Break the lab. Fix it. Break it again. That cycle of destruction and repair is where real learning happens.
And keep the lab quiet enough that your cat can sleep nearby. Feline approval is the ultimate benchmark of home lab success.

Your learning machine awaits. Start building.